Layout Editor: Calendar Object
(Not available in the Lite version)
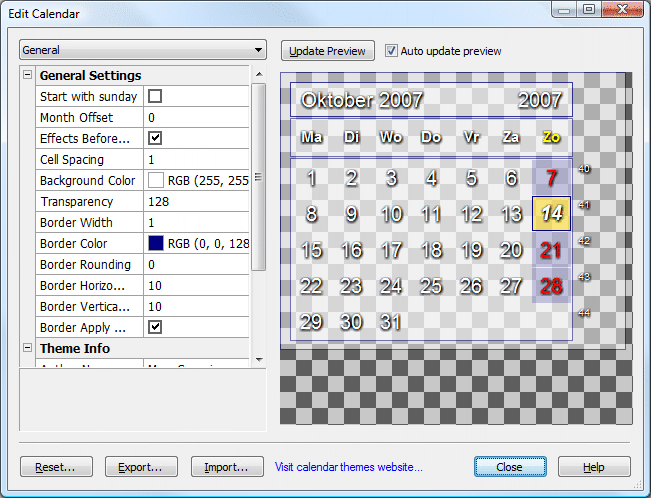
This window allows you to customize your calendar object.
The dropdown list and listbox on the left of the window allow you to manipulate all settings of the calendar. The right of the window displays a preview of your calendar. To update this preview, click on the "Update Preview" button or if your computer has enough power, enable the "Auto update preview" option.
The "Reset" button at the bottom-left will reset all the settings of the calendar to the default values. Use the "Export" button to export your current calendar to a file, so that you can later import that customized calendar again by using the "Import" button. Fonts that are not installed on your system but are used in an imported calendar will be replaced by another font on your system.
|
Note: When you export your template you can put a .JPG file in the same folder with the same name as your template. Wallpaper Cycler will use that JPG file as a preview of your template. For examples, see the "Calendar Templates" folder in your Wallpaper Cycler installation folder. |
The dropdown list at the top-right of the window displays all parts of a calendar. The table below shows all the parts available in a calendar and the screenshot on the right shows which part it is with a red rectangle. Note: when you click on a setting in the settings-tree on the left of the window, a little description of that setting is shown at the lower-left of the window.
|
General |
Changes some general settings of the calendar and the look of the border around the calendar. The general settings contains a section called Theme Info which might be useful to fill in when you export your calendar layout. These theme info settings include: author name, email, URL and description. Most of the other general settings are self explanatory. The more difficult are explained below:
|
|
|
Preview |
The preview section allows you to change some settings of how the preview at the right of the window is rendered. You can specify if you want a checker pattern or not and you can customize the checker pattern. |
|
|
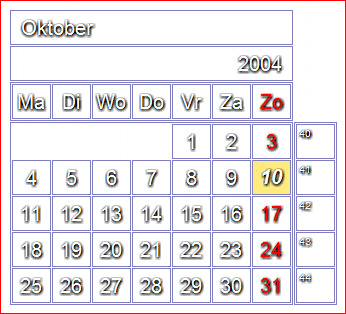
Cell Frame |
Changes the look of the cell frame, which is the red frame in the screenshot on the right. |
|
|
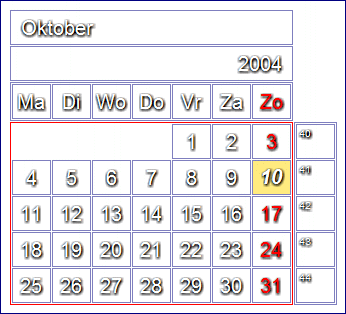
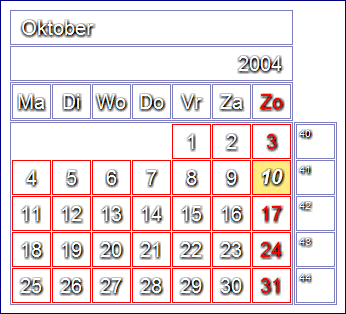
Cells |
Changes the look of the cells, which are the red frames in the screenshot on the right. |
|
|
Cells Monday |
These settings change the look of the same parts of the calendar as the Cells settings above, but allow you to override certain options for specific days. With these you can for example change the look of ALL Sunday cells. If you don't want to override a setting leave it set to don't override or -1 or 999 (see the little description at the bottom of the properties list). |
|
|
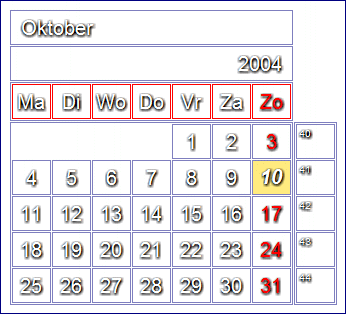
Header Frame |
Changes the look of the header frame, which is the red frame in the screenshot on the right. |
|
|
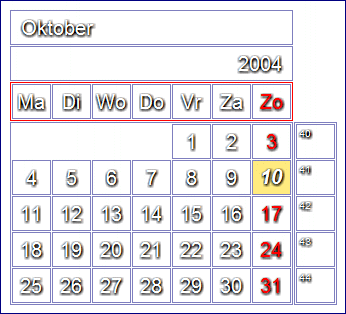
Header Cells |
Changes the look of the header cells, which are the red frames in the screenshot on the right. |
|
|
Header Cells Monday Current Day Header |
These settings change the look of the same parts of the calendar as the Header Cells settings above, but allow you to override certain options for specific days. With these you can for example change the look of the Sunday header cells. If you don't want to override a setting leave it set to don't override or -1 or 999 (see the little description at the bottom of the properties list) |
|
|
Current Day Cell |
Changes the look of how the Current Day Cell is rendered. |
|
|
Day With Note Cell |
Changes the look of how the days with notes are rendered. You can specify notes with the Calendar Notes Editor. |
|
|
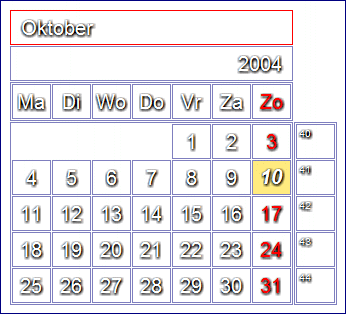
MonthYear 1 |
Changes the look of the MonthYear 1 cell, which is the red frame on the screenshot on the right. |
|
|
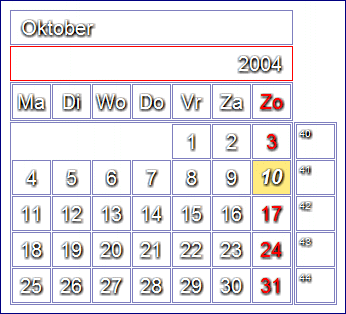
MonthYear 2 |
Changes the look of the MonthYear 2 cell, which is the red frame on the screenshot on the right. There is an extra setting for this called Render Above MonthYear 1. When this is enabled, the MonthYear 2 cell will be rendered on top of the MonthYear 2 cell. Using this feature you can for example left align the month name in the MonthYear 1 cell and right align the year in the MonthYear 2 cell to give a nice effect. If you do this, it is best to set the background color of the MonthYear 2 cell to none. |
|
|
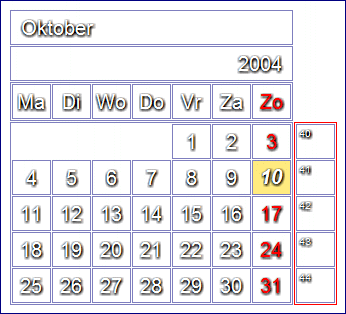
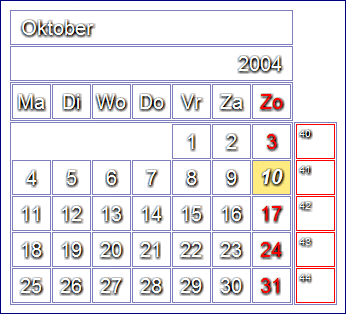
Week Numbers Frame |
Changes the look of the week numbers frame, which is the red frame in the screenshot on the right. |
|
|
Week Numbers |
Changes the look of the week number cells, which are the red frames in the screenshot on the right. |
|
1 Font Note: When you select the Font setting, a button will appear and when you click that button a new window will allow you to configure the font. This window does also contain a Color setting, but you can't use that to change the color of the text. If you want to change the color of the text you have to use the option Text Color in the settings tree.
|
Copyright © 2009 NuonSoft |